

Step-by-Step Application Instructions
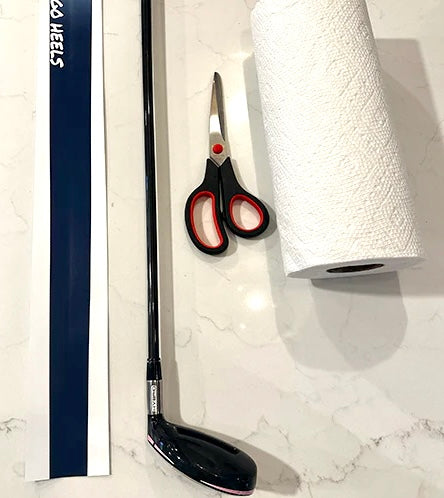
Step 1: Gather Your Tools
You will need:
- Your golf clubs
- Your shaft wraps
- A pair of sharp scissors
- A clean paper towel
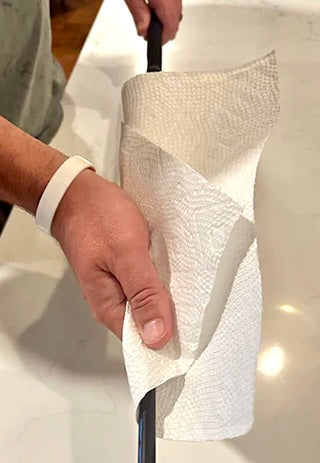
Step 2: Prepare the Shaft
Wipe the shaft with a clean, dry paper towel to remove any dirt or residue.
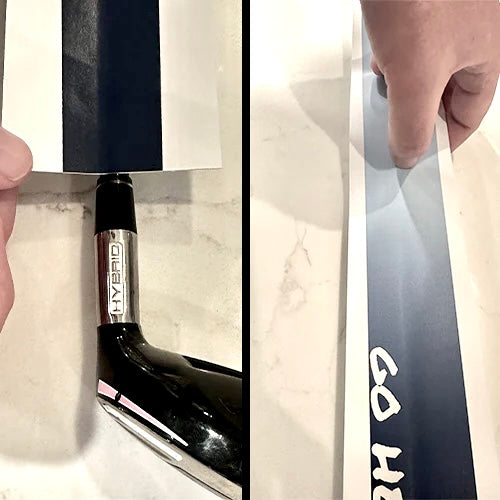
Step 3: Measure & Cut
- Lay the club on a flat surface with the clubhead facing down.
- Place the wrap on top of the shaft, positioning the narrow end where the shaft meets the ferrule.
- While holding the narrow end of the wrap, use your other hand to mark the spot where the shaft and grip meet with your thumbnail.
- Cut at the marked spot.
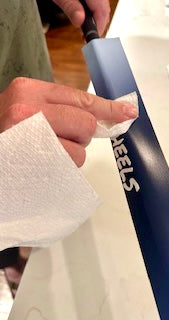
Step 4: Adhere the Wrap
- Peel off the entire backing from the wrap. Be careful not to let the wrap fold onto itself.
- Position the wrap with the wide end at the top and the narrow end at the bottom. Align the center of the wrap with the center of the shaft.
- Using a paper towel, press the center of the wrap firmly onto the shaft making long strokes up and down the shaft until it adheres securely.
- Next, adhere the side without the logo or custom text using the same long stroking method. Then, adhere the other side. A small overlap is normal.